A recipe for pheasant Kiev
That 70s classic, chicken Kiev, gets an update from Tim Maddams with succulent hen pheasant breasts

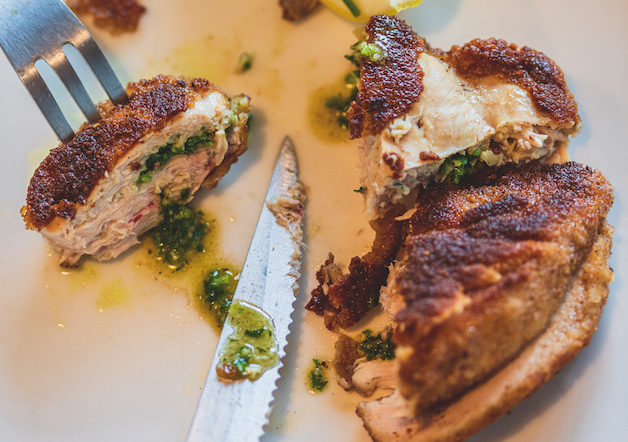
Pheasant Kiev
The true history of the chicken Kiev. It is likely that it came into its recognisable form when French chefs were employed by very wealthy Russians in their kitchens in the 18th century. Being a shooting chef, I have ditched the flabby fowl and plumped for hen pheasant breast instead to create pheasant Kiev.
Pheasant Kiev is a dish that works best with the smaller breasts of the hen birds, which are also the more tender of the sexes. While we don’t all hang on to game until the spring, it is worth putting a few pheasant breasts aside in the freezer — so when the wild garlic season comes round, you can marry ethically sourced game meat with one of my favourite ingredients from nature’s larder. It is also worth noting that this dish would work well with a few plump partridge breasts should you have them to hand. As all parents know, it isn’t always easy to get your youngsters to eat game meat. but I imagine that even the very fussiest of eaters would be keen to tuck into a pheasant Kiev.
Ingredients
- 4 prime condition hen pheasant breasts, skin removed
- Salt and pepper, to season
- For the coating: 50g flour
- 2 eggs, beaten with a dash of water
- 100g breadcrumbs plus 50g butter for cooking
- 50g softened butter, plus some extra for frying
- 2 cloves of garlic, very finely chopped
- 1tsp of chopped tarragon
- 1dsp of chopped parsley
- Lemon wedges and parsley sprigs, for garnish
Method
- Lightly season the pheasant breasts and heavily season the flour.
- Beat the eggs and set up three dipping bowls for the coating process.
- Starting at the thick end of the breasts and, aiming for the thin end, stab an incision into them with a sharp, pointy knife. Take care not to allow the tip of the blade to exit the meat, thus allowing the butter filling to escape in two places instead of one.
- Beat the softened butter and add the garlic and herbs. Season well then use a spatula to scrape all the butter into a piping bag. Pipe as much butter as the breast fillets will take without swelling too much into the incision made in each one.
- Dip the breasts into the seasoned flour, then the egg and finally the breadcrumbs. Allow excess egg to run off before placing it in the crumbs as too much will mean there is too -thick a layer of breadcrumbs on your Kievs.
- Bring a frying pan to a low sizzle temperature, then add a knob or two of butter. Place the Kievs in the pan, skin-side of breast down (even though there is no skin). Cook until golden brown, then turn and repeat.
- Turn off the heat and allow the breasts to rest in the pan for a few minutes. As long as the Kievs are not straight from the fridge, they should cook in 12 to 15 minutes. Serve with a wedge of lemon and a sprig of parsley.


